On this page
Setup & Integration
Install, connect, and begin synchronizing your WooCommerce multistores quickly:
1. Install & Activate Plugin
- Download from store.mulika.in and install via Admin → Plugins → Add New.
- Activate the plugin.
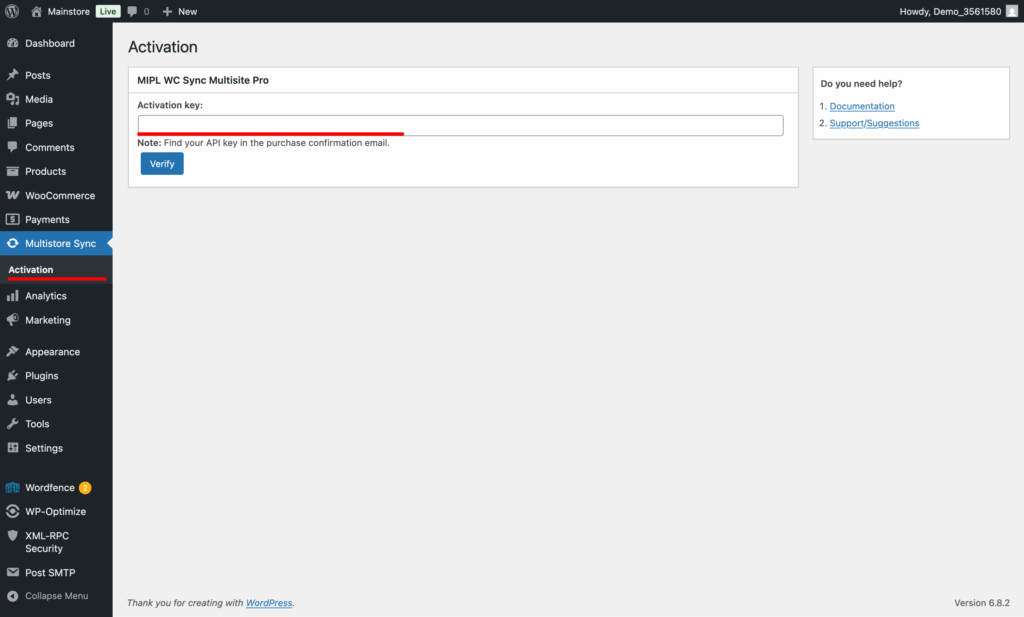
2. Activate via API Key
- Find your API key in the purchase confirmation email.
- Enter it in the plugin activation section and click “Verify.”
3. Add Sub-sites / Sub-stores
- Backup your store database first.
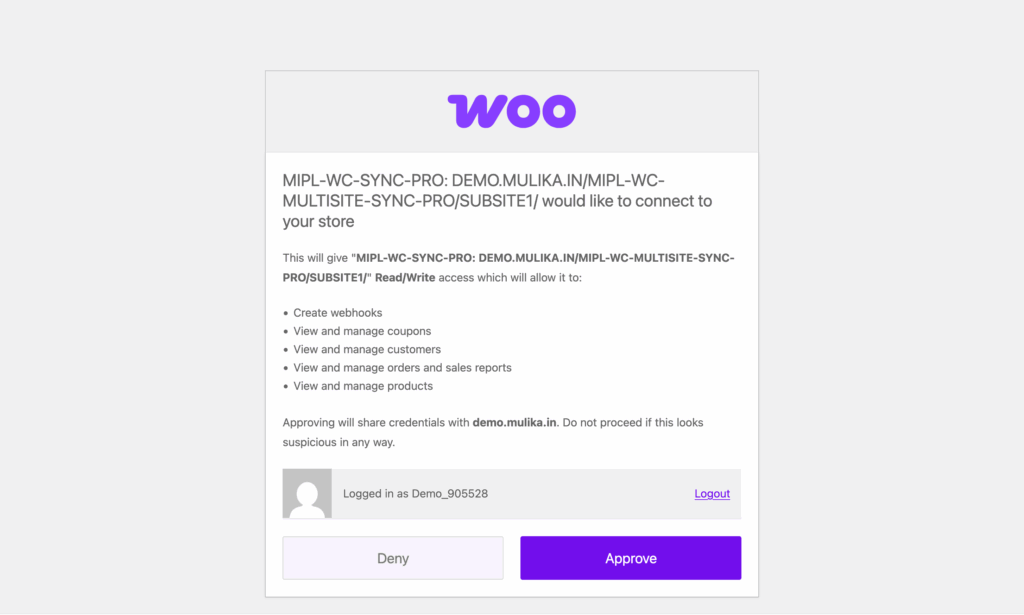
- Enter sub-store URL, click “Connect,” approve the connection, then sync begins automatically.
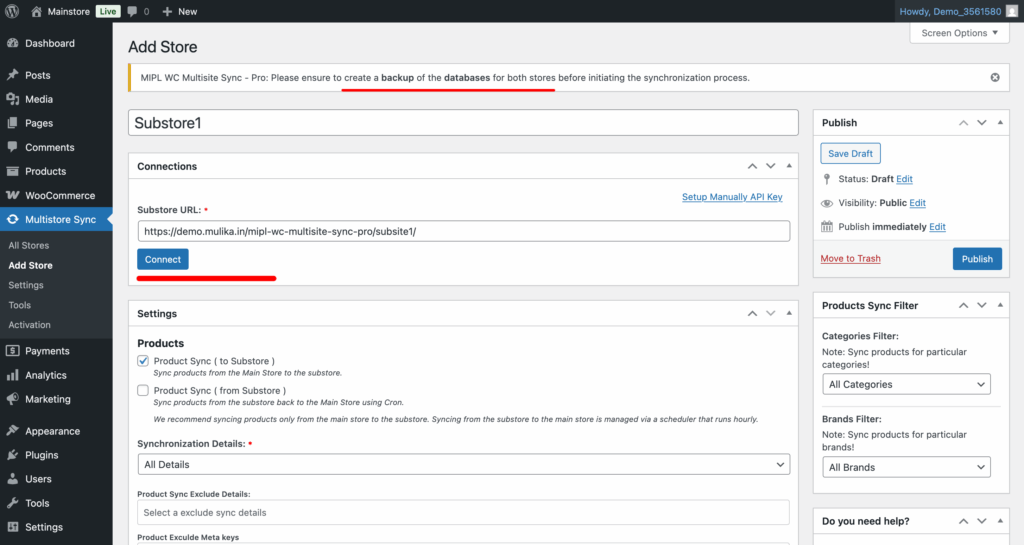
4. Configure Sync Settings
- Select what to sync (products, orders, coupons, customers, reviews, categories, tax, etc.).

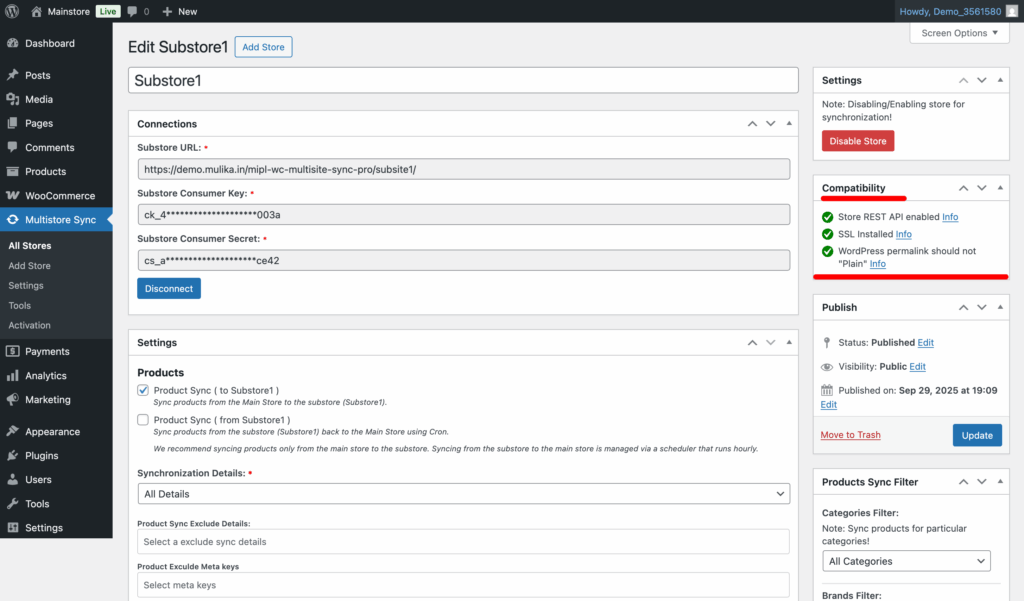
5. Check Compatibility
- Ensure all compatibility checks are green before syncing.
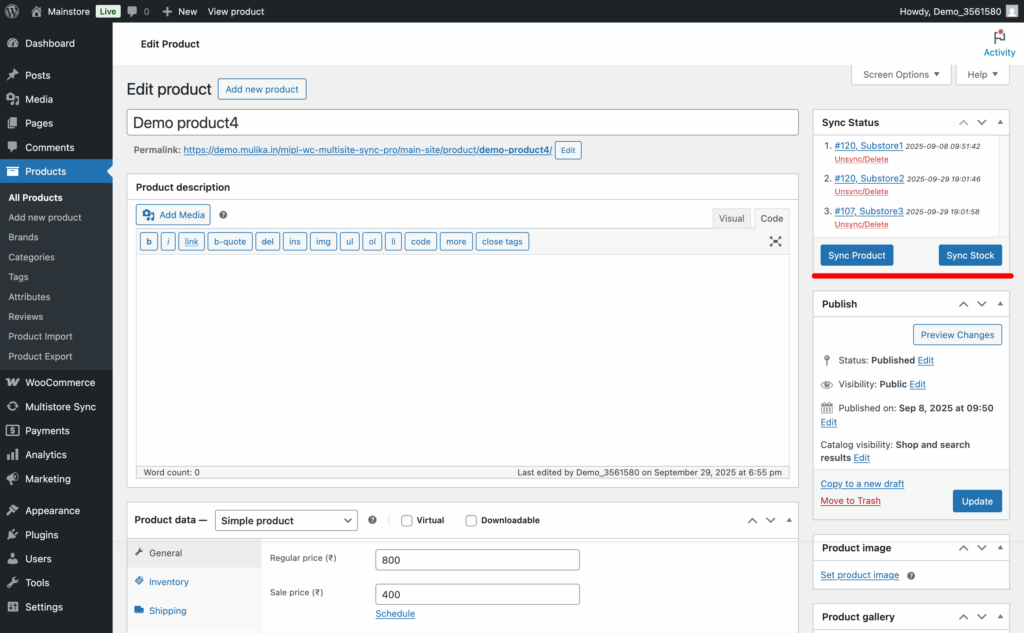
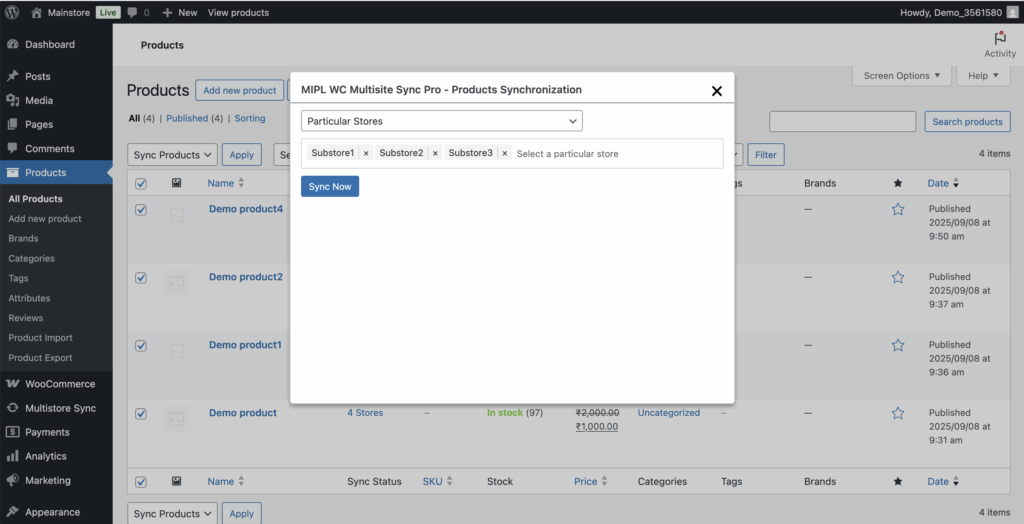
6. Start Synchronization
- On the product edit page, sync full details or stock only.
- Click “More Product Sync Options” for extra settings.
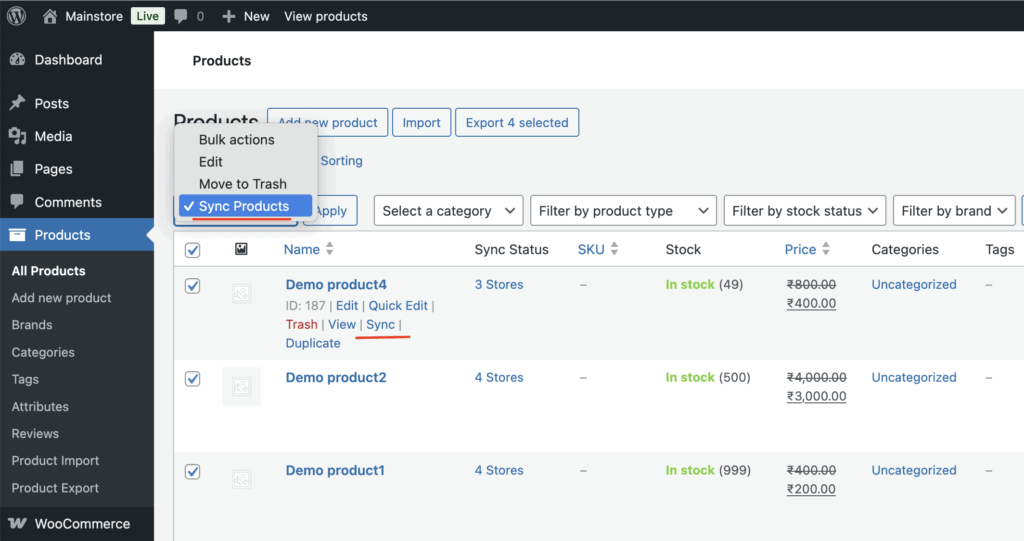
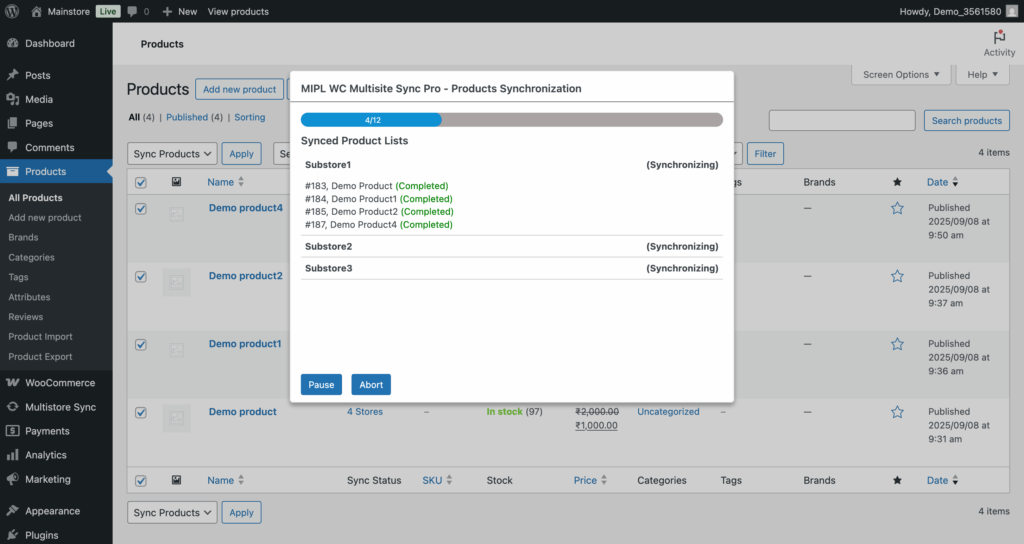
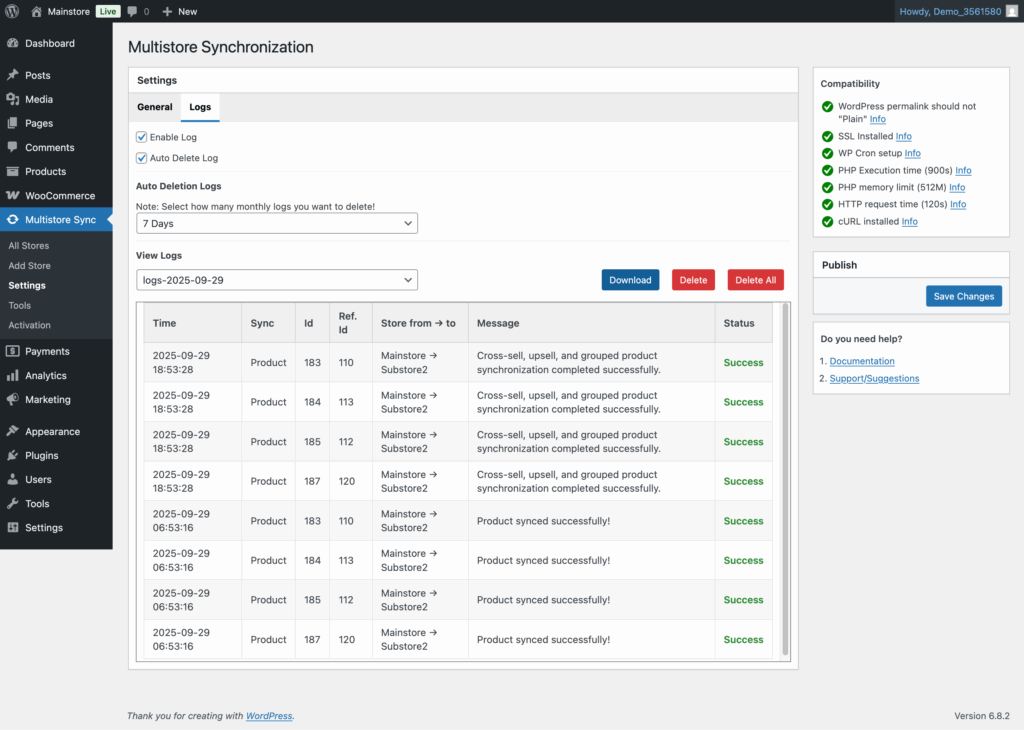
7. Monitor Sync Logs
- Enable logs via Admin → WC Multisite Sync → Settings to track data sync activity.
Next steps: